Integrate NDepend with FinalBuilder
Introduction
FinalBuilder 7 supports code quality analysis of .NET assemblies through NDepend. Include detailed analysis and reporting of code metrics in your build process via the FinalBuilder NDepend action.
Create NDepend Project
I have created a small .NET application simply called MyApplication which I am going to analyse using the NDepend action within FinalBuilder. First of all I use VisualNDepend to create my NDepend project file. From the Project Properties page I simply add the .NET Assembly that I wish to analyse, in this case I want to analyse MyApplication.exe.
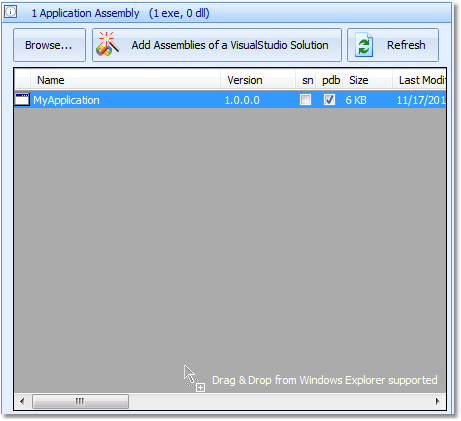
Once I have added this assembly to the list of assemblies to be analysed, I can now save my NDepend project and exit Visual NDepend.
Create FinalBuilder Project
Now I open FinalBuilder and create a new project which I have saved in the same location as the NDepend project that I created above. If you have not used the NDepend action within FinalBuilder before you may need to specify the install location via Tools -> Options -> Source Code Tools -> NDepend. Select the directory where NDepend resides on your machine. Add the NDepend action to the action list by clicking in the search field of the actions tab (or press Ctrl + I) and begin to type NDepend until you see the NDepend action. Press enter or click on the action to add it to your build process.
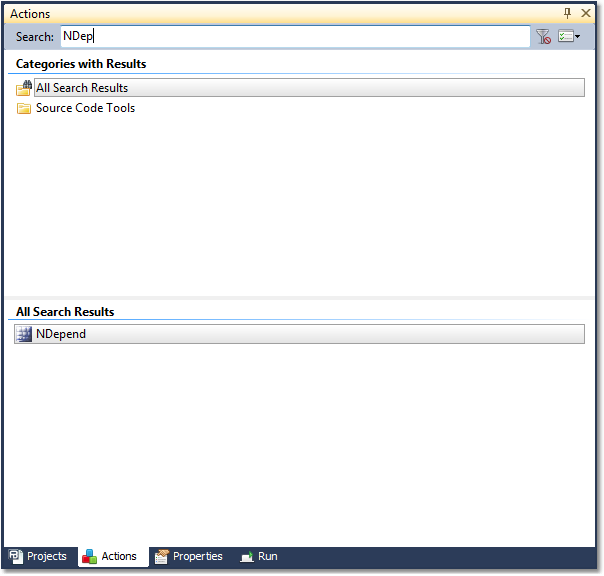
You will now be presented with the NDepend action page. This allows you to specify the details for your NDepend project. Before doing this I am going to add some other actions to my build process. So I am going to click Ok and come back to this.
Configure FinalBuilder Project
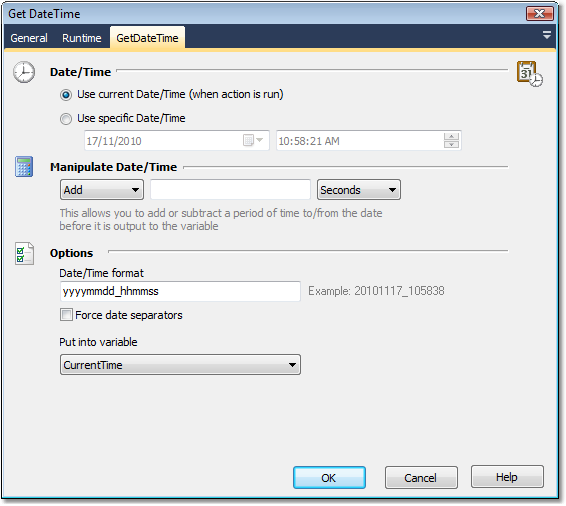
As a part of my build process I want to create a new output folder each time an NDepend report is created. To do this I have created two FinalBuilder variables, CurrentTime and NDependOutput. Then what I have done is added the Get DateTime action to store the current time in the CurrentTime variable in the format YYYYMMDD_hhmmss.
I am going to use my other variable NDependOutput to specify the output directory for NDepend. I am going to create a folder in the same directory as my FinalBuilder project with a name in the following format NDepend_YYYYMMDD_hhmmss. To do this I use the Set Variable to set the NDependOutput variable to the following variable to the following: %FBPROJECTDIR%\NDepend_%CurrentTime%
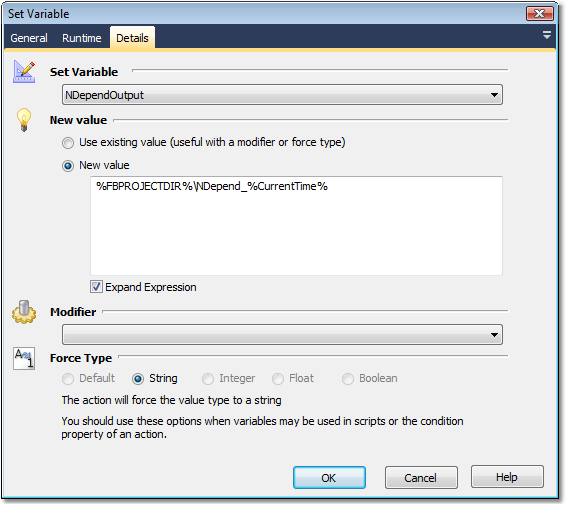
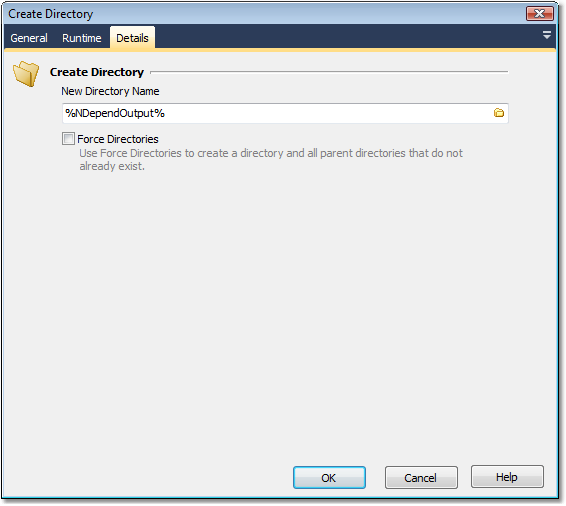
The FBPROJECTDIR variable will expand to the directory that contains the FinalBuilder project file and the CurrentTime variable will expand to the format that I defined above. Next, I use the Create Directory action to create this directory before running the NDepend action.
Finally , I specify the details required for my NDepend action. As I mentioned earlier I created my NDepend project within the same directory as my FinalBuilder project. This allows me to reference my project file as: %FBPROJECTDIR%\NDependProject\MyNDependProject.ndproj Then for the output directory I specify my custom output location as: %NDependOutput%
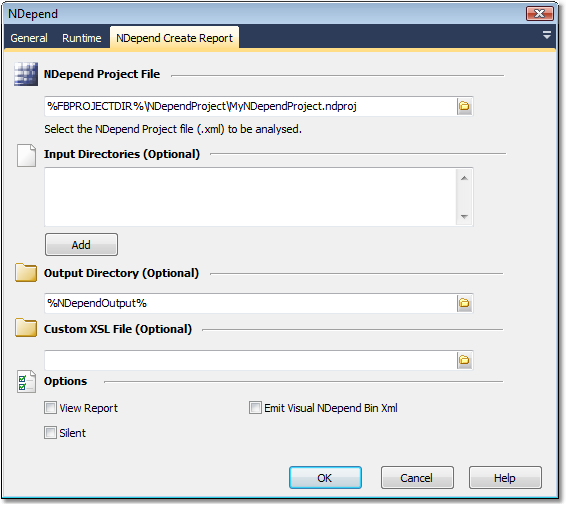
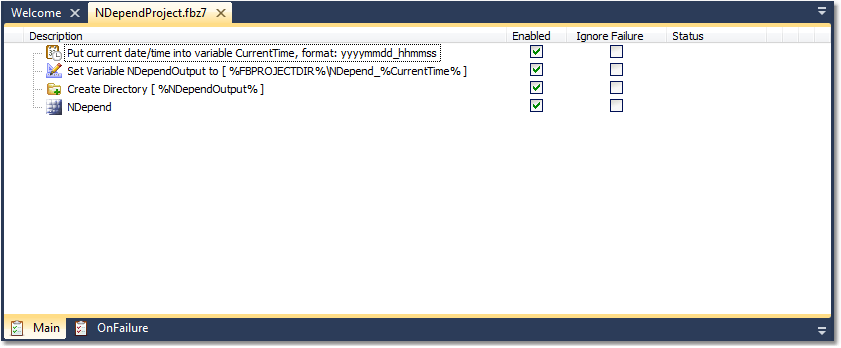
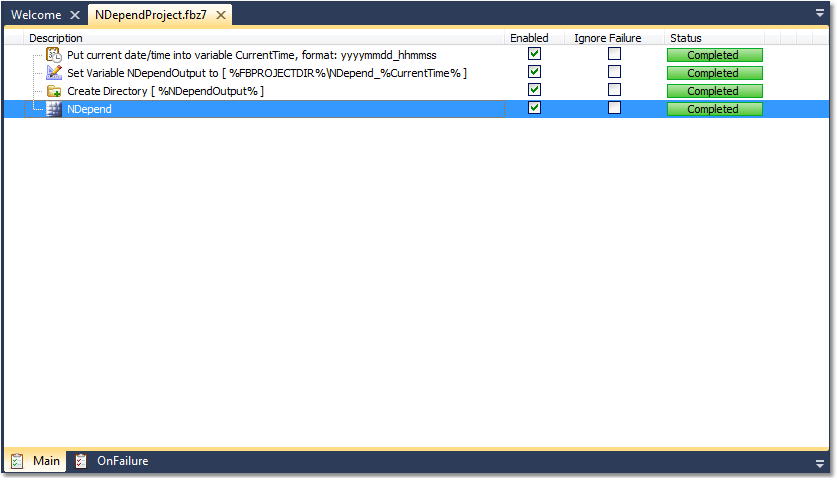
I am not interested in any of the other options available for this project so I click Ok to confirm these settings. My action list now contains four actions:
- Get current date time and assign it to CurrentTime variable
- Set Variable NDependOutput to the value of %FBPROJECTDIR%\NDepend_%CurrentTime%
- Create a directory with the path %FBPROJECTDIR%\NDepend_%CurrentTime%
- Run NDepend code analysis and output file to %FBPROJECTDIR%\NDepend_%CurrentTime%
Running the FinalBuilder Project
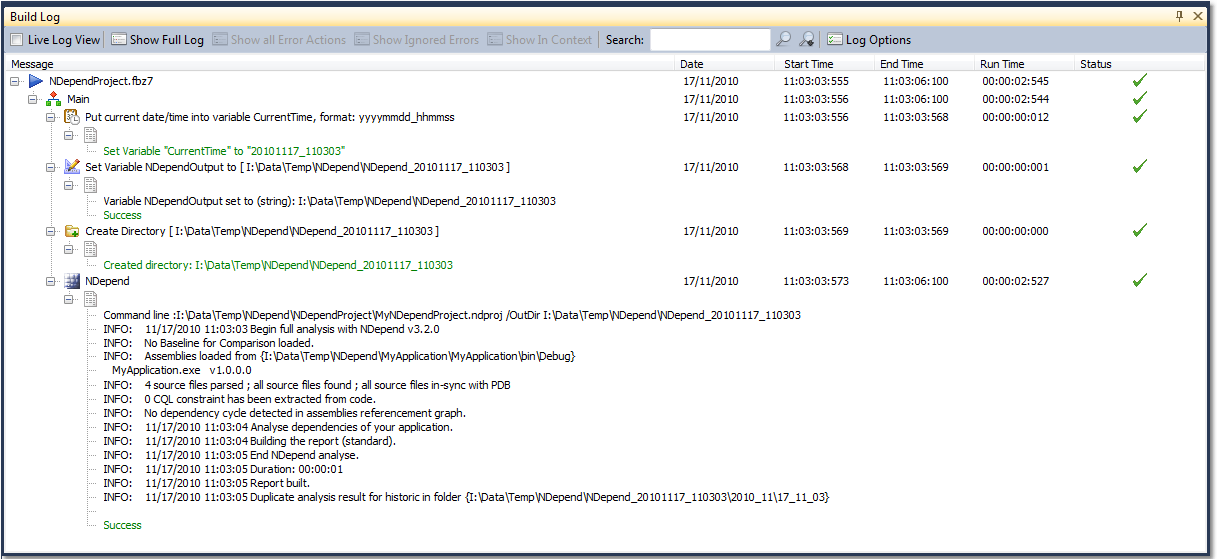
Now run the FinalBuilder project to create the output directory and analyse your assembly using NDepend. You will be able to see from both the Action List window and the Build Log that a successful build has completed.
Expanding each node of the Build Log reveals the details of each action.
